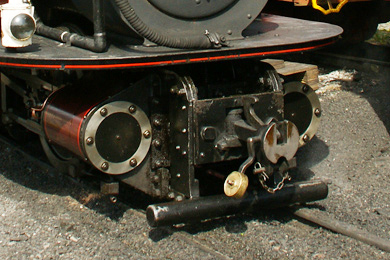
The front buffer beam is an ingenuous piece of metal origami. It is not overly difficult and does not require any special tools but you have to picture it first. May be this page helps to do just that.
[19] in the instructions was a complete mystery to me. I want to build Merddin Emrys. So?? |
 |
 |
| My photo archive brought a quick answer. David Lloyd George (left) has a lever arrangement in front of the cylinder cover and this oviously operates the cylinder cocks. Merddin Emrys (right) simply does not have that. Okay, job done ;-) |
 |
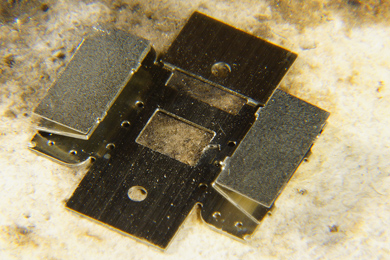
As [21] suggests locating the part in the etch is not very straightforward. Its has a lot of elements and just be extremely careful to cut the right etch tabs.
[23] "The crash bar brackets". Huh? I found some extra thingies in the diagram on the top of the page so I suspected these to be the crash bar bracket. The kit has been logical so far, so wouldn't these be located in the fret quite near the place were the front buffer beam was? Yes they are (yellow arrows). For now, following [23] I kept them in the fret. |
 |
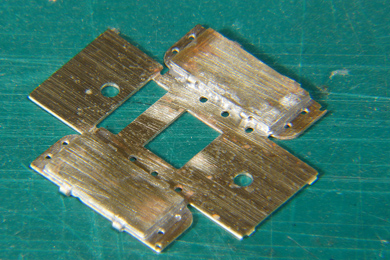
Folding as per figure 18. I put flux in place and put some scraps of solder in between and simply collapsed the three layers by pushing the soldering iron on it. That was a tad too unsubtle. For the next bogie I'll first tin the surfaces collapse the three layers completely, heat it and add solder as needed.
|
 |
Thankfully theare are only minor bruises on the part.
The extra part on the left top end, also visible in the figures of the instructions, was a complete mystery to me. In the figures it simply vanishes and not a word about it in the instructions. |

|
Then I realised that this part needed to be separated
|
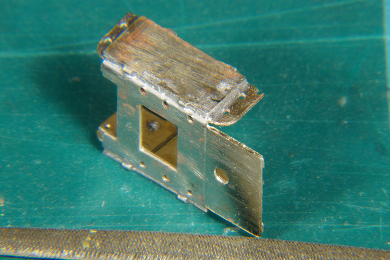 |
The buffer beam was folded. The two sides first. Then you can easily get to the part that after folding will form the top of the buffer beam. You can decusp it now and the kit is so accurate that you really need to do that in order to fit it between the two vertical plates.
|
 |
Folded and..... this is were this mysterious sheet goes!
|
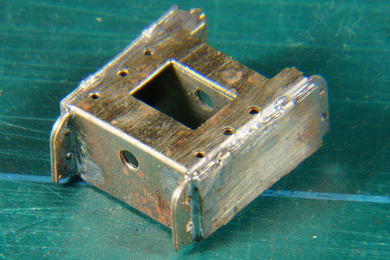 |
Maybe you have noticed I hardly mentioned decusping. Well usually I do that as soon a part comes out of the etch fret, but in this case I postponed that until after soldering. So now is the time for filing. |
 |
After filing, sanding and cleaning
|
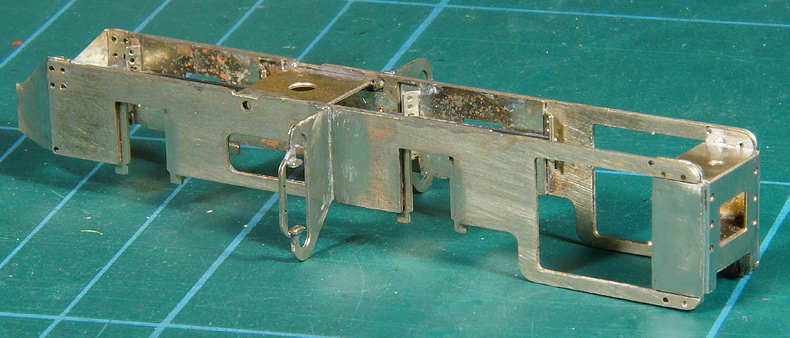
And this is how it will fit in the frame. Do not attach the spacer until the cylinders have been done |


Sign my
GuestBook